|
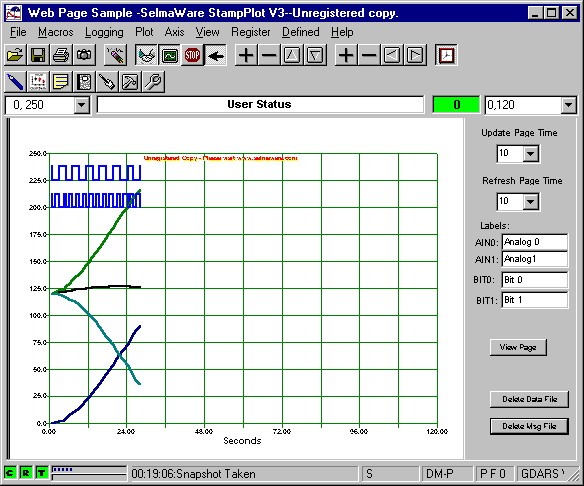
StampPlot can be used to create web pages using the data and
snapshot images.
This example is self-contained, and will prepare a web page with a snapshot and
the plot data.

If you open this macro directly, it may run properly, but you
might want to save it to a directory first.
Webpage.spm
See a sample page (not
actively updated)
Discussion of this macro:
This macro allows setting configurations for the web page,
such as the frequency of updating the image and the data, and the frequency with
which to refresh the browser using JavaScript. There are several issues in
working with web pages, one of which is when working with images, or other
media, the page must be able to locate the image or media. To make this
self-contained, the macro itself creates a web page using the data logging
features of StampPlot to create a web page 'log'.
General macro operation:
- A timer is used to a macro routine which updates the
webpage.
- The data log file name is changed to webpage.htm in the
current macro directory:
!NAMD (PATH)webpage.htm
- The old webpage (data file) is deleted:
!DELD
- Date/Time appending for images is disabled to maintain a
constant image name:
!APDT OFF
- An image is taken of the plot:
!SNAP (PATH)plotimage
- Time stamping is disabled so that directly-logged data does
not get stamped.
- All files created use (PATH) to maintain them in one
location.
- The web page is created using the !LOGD instruction for
each line of the page. The web page consists:
- JavaScript is used to regularly update the web page by
setting the time using the refresh time object which is replaced when
the instruction is performed.
!LOGD var limit="(page_refr)"
- The page is created using StampPLot macro values
throughout:
!LOGD <td
width="20%"><b>(txtAnalog0)</b></td>
!LOGD <td
width="20%">(AINVAL0)</td>
The plot image is inserted with:
!LOGD <p align="center"><img border="0" src="(SNAPNAME)"><br>
Note: (SNAPNAME) returns only the name of the snapshot. (SNAP) returns
the entire path which would be inappropriate for paged being 'served'
though it would work on the local machine. (Also, a bug in beta prior to
0.95 prevented (SNAP) from being updated in certain circumstances)
- Once created, the name of the data file is returned to
the normal name for data files and time stamping is re-enabled
!NAMD (PATH)webdata.txt
!TSMP ON
- The webpage is opened in the browser (associated
application) using the View Page command button event code of:
!POBJ View_Page.C=!APPA (PATH)webpage.htm
Issues:
- To be served out from a server, the directory the macro is
ran from must be a web-share. This means that you are running Personal
Web Server, Internet Information Server (IIS), or another webserver.
Typically, this would be the InetPub/wwwroot directory. Or, a virtual
directory may be used to point to the directory.
- In JavaScript, subscripts are denoted such as
data[0]. StampPlot corrupts the [0] by treating it as a math operation
and returning 0 for data0. No fix or workaround is available
yet. This example removed all use of these for the auto-refresh
script.
- Beta versions prior to 0.95 do not delete the data file
properly when it exists outside of StampPlot's Data directory leading to
multiple sets of data on the page.
Other options:
This example was fairly complex to make a self-contained version. Some other
options you may explore:
- The image alone, or data file may be sent to a active
webshare directory. For example, for a snapshot, simply provide the
path from StampPlot to the directory
!SNAP c:\inetpub\wwwroot\plotimage
Then simply develop a page that will use that image in another web
development application.
- Instead of having the webpage contained in the macro, a
template may be created, and the template command may be used to replace the
StampPlot values. An example of this is in the help files.
!TMPL template.htm,C:\inetpub\wwwroot\default.htm
- Instead of deleting the old web file with !DELD, simply add
to the existing file with new data (images not recommended due to naming
issues, but possible).
- If you use meters, etc, enable snapshots of the entire form
using !FORM ON. Note: The
form must remain visible on the desktop.
- If you use images, such as the LEDs, place them in the same
directoryand address them in html as:
<img src="led_red_(BIT1).jpg">
|